
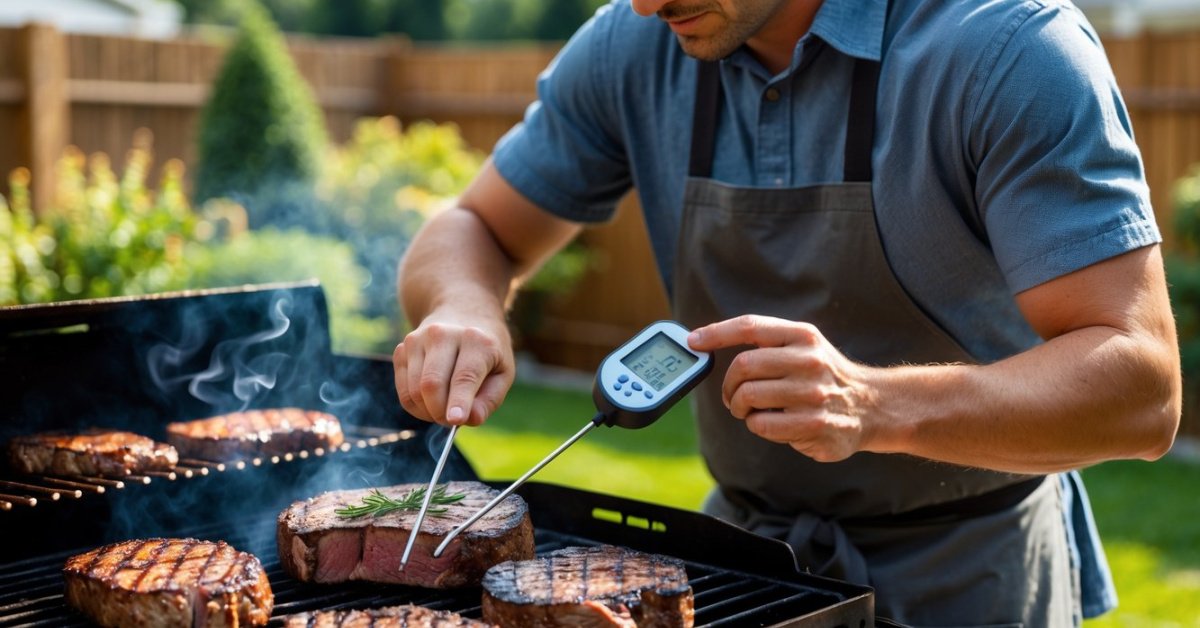
Grilling’s always been a bit of an art for me but I love using new gadgets to make it easier. Infrared thermometers have popped up everywhere promising quick and easy temperature checks without ever touching the food. It sounds like the perfect solution especially when I’m juggling burgers steaks and veggies all at once.
But like any tool in my grilling arsenal an infrared thermometer has its ups and downs. Before I rely on it at my next backyard cookout I want to really weigh the pros and cons. Let’s see if this high-tech helper can actually take the guesswork out of grilling or if it’s just another gadget collecting dust in the drawer.
What Are Infrared Thermometers for Grilling?
Infrared thermometers for grilling let me measure surface temperatures on grates, meat, or pizza stones without touching the food. These devices use infrared sensors to detect thermal radiation emitted by objects, providing a quick readout—usually in less than 1 second. I just point the laser at the area I want to measure and squeeze the trigger.
Most infrared thermometers I’ve tested display temperatures in Fahrenheit or Celsius. They use batteries, work at a distance, and often read within a ±2°F margin of error according to product specs from brands like ThermoWorks and Etekcity. I use them to check hot spots across the grill, compare temperatures on different sections, or verify if a cast-iron pan is preheated enough for searing.
Compared to probe thermometers, infrared models give me surface readings only. That means I can check if my grill grate is hot enough for steaks, but not if the inside of a brisket has reached safe doneness. For indirect grilling, I often pair an infrared thermometer with a wired or wireless probe to get a full picture of the cooking environment.
How Infrared Thermometers Work
Infrared thermometers measure temperatures differently than the standard probes most folks use for grilling. I lean on these gadgets to get instant readings of surface temperatures on grill grates, cast-iron pans, and pizza stones.
Key Features and Technology
Infrared thermometers use sensors to detect infrared energy radiating from surfaces. The device converts that energy into a temperature reading, usually displaying it in under a second. Most models I test have accuracy margins of about ±2°F and offer both Fahrenheit and Celsius settings. A built-in laser helps me pinpoint exactly where I’m measuring. No-contact readings keep things clean and fast—helpful when I’m moving between racks or checking stone temps during a pizza cook.
Differences from Traditional Thermometers
Infrared thermometers read surface temps only, while traditional thermometers—like wired probes or instant-read sticks—measure internal temperatures. This distinction matters when I want to check a steak’s doneness versus confirming my grill grates are preheated. I use infrared models to scan for hot or cold spots, then rely on probe thermometers for final meat doneness checks. Traditional thermometers require direct contact with food or surfaces, often piercing the meat, while infrared tools take readings without ever touching the food.
Pros of Infrared Thermometers for Grilling
Infrared thermometers give me a fast, reliable way to check temperatures while grilling anything from brisket to burgers. These tools add real convenience and control, especially during busy backyard BBQs.
Quick and Accurate Temperature Readings
Infrared thermometers deliver surface temperature readings in less than one second, which helps me track grill heat without delay. I consistently see an accuracy margin of ±2°F, according to most models I’ve tested, so I trust the numbers when adjusting flame or moving food to cooler zones. This speed and precision means I don’t second-guess if the grates are hot enough for searing steaks, making it easy to keep every batch consistent.
Non-Contact and Hygienic
Infrared thermometers let me check temperatures without touching meat, grates, or pizza stones, preventing messy cross-contamination. I don’t need to clean the tool between checks or worry about poking holes in smoked ribs or sausages, which keeps my presentation sharp and the grill area cleaner. This no-contact design is vital when I’m grilling large batches or handling food for a big group, since food safety always comes first in my outdoor kitchen.
Versatility for Multiple Uses
Infrared thermometers help me with much more than just grilling steaks. I use them for preheating cast iron, checking the temp of pizza stones, and finding hot spots across different zones of my large offset smoker. Whether I’m roasting veggies, baking bread on the grill, or monitoring dessert stones, these thermometers save me time and give me better control over every recipe. This versatility is what really makes infrared thermometers a staple in my BBQ toolbox.
Cons of Infrared Thermometers for Grilling
I’ve tested dozens of infrared thermometers on my grills, and while they offer some real benefits, they also come with a few drawbacks that matter when chasing perfect BBQ results.
Surface-Only Temperature Measurement
Infrared thermometers only measure the surface temperature of food or grill grates. I find this limiting when cooking thicker cuts of brisket or bone-in chicken, since knowing the surface temp doesn’t tell me if the inside has reached safe or ideal doneness. If the internal temperature matters, like for ribs or steaks, I switch to a probe thermometer for accuracy.
Inconsistencies on Reflective or Transparent Surfaces
Infrared thermometers sometimes struggle with shiny metal grill grates and glass lids. I’ve noticed inaccurate readings when the grate surface reflects the sensor’s beam, or when glass doesn’t radiate heat the way the sensor expects. Whenever a surface reflects too much, I try to find a dull spot or use a different surface to get a true temperature.
Battery Dependency
Infrared thermometers rely on batteries to function. During long weekend BBQs or busy competitions, I’ve had thermometers power down mid-session, forcing me to dig up a spare battery or fall back on old-school analog tools. I always keep extra batteries on hand but balancing battery management with grilling isn’t always ideal.
When to Use Infrared Thermometers for Grilling
I use an infrared thermometer for grilling whenever I need a fast, accurate surface temperature check. For example, when I’m firing up the grill for Texas brisket or prepping the perfect pizza stone, instant feedback matters. Surface readings help me dial in the right sear on steaks, chicken thighs, or pork ribs by ensuring my grill grates are at the ideal temperature before the meat hits the heat.
I grab my infrared thermometer for these grilling tasks:
- Checking grill grate temps before cooking
I scan the grates in a few spots before laying down meat, which helps me find and avoid hot or cold zones.
- Preheating cast iron or pizza stones
I confirm my cast iron pans or pizza stones reach around 500°F before baking pizzas or blackening fish, giving more consistent results.
- Quick spot checks during large BBQs
When I’m serving dozens at a family gathering, I ensure each cooking zone, like indirect and direct sections, stays in the right range for brisket or sausage.
- Monitoring burger flips without opening the lid too long
I pop the lid and zap the patties for an estimated surface reading, speeding up service during busy BBQs.
I skip using infrared thermometers for checking meat doneness because they miss internal temperatures. For brisket, pork butt, or thick chicken, I always pair the infrared thermometer with a probe for an internal check. I avoid measuring on shiny or glass surfaces since heat reflections can skew readings.
Whenever speed, non-contact checks, and grill surface management matter, I rely on my infrared thermometer. For safe, juicy BBQ, I always layer in internal readings with a probe thermometer.
Tips for Getting the Most Accurate Readings
Point infrared thermometers at matte surfaces to get the most consistent temperature readings, since shiny or reflective grates like chrome can throw off the sensor. I usually move the thermometer to a spot where the cast iron or grill is dark and clean before taking a reading.
Keep the lens clean to prevent grease, soot, or smoke buildup from affecting accuracy. I wipe mine down after every session, especially during long cooks or when grilling fatty meats like brisket or ribs. Any debris on the lens distorts the reading.
Check the target spot size or distance-to-spot ratio listed in your thermometer’s specs, since this tells you how far away you can hold it and still measure only the intended surface. I hold mine around six to eight inches from the grill for a focused measurement, but for pizza stones or cast-iron pans, closer is better.
Calibrate your infrared thermometer regularly by comparing it with a boiling pot of water or an ice bath, since even a ±2°F margin of error can matter with sensitive cuts. I drop my thermometer over a pot of boiling water (212°F at sea level) to see if the numbers match.
Scan multiple spots on the grill instead of relying on a single reading, because hot and cold zones develop fast, especially with offset smokers or charcoal grills. I scan left, right, and center before dropping on steaks or burgers.
Pair infrared readings with a probe thermometer whenever I grill thick cuts, since surface temperature alone doesn’t confirm doneness. I trust the infrared for tracking surface zones but always check internal temps for brisket or chicken thighs.
Replace batteries before big cookouts, since weak power leads to unreliable results. I keep spare AAA or 9V batteries in my bbq toolbox, ready for long sessions.
Conclusion
After spending plenty of time grilling with an infrared thermometer in hand I’ve come to appreciate its unique strengths and quirks. It’s a handy tool that makes managing grill temperatures much easier and keeps things clean when I’m cooking for a crowd.
Still I know it’s not a one-size-fits-all solution. For me the best results come from using it alongside a trusty probe thermometer. If you’re curious about grilling tech or just want to streamline your BBQ routine an infrared thermometer is worth a try—just be ready to use it as part of a bigger toolkit.


